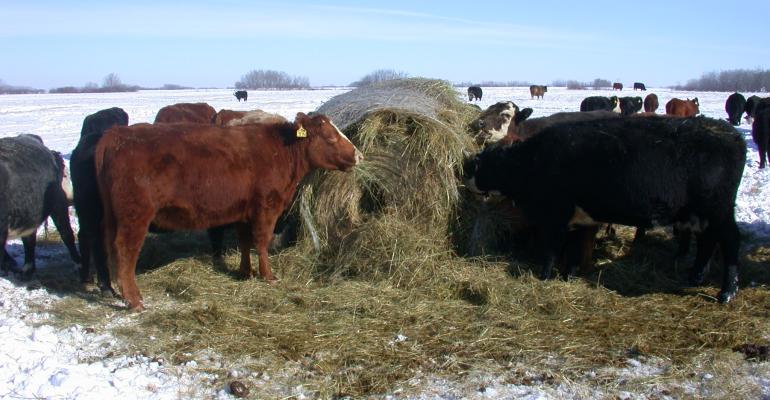
8 things to consider when developing a winter pasture or feeding area on the farm.
1. Site selection for winter feeding areas
Care needs to be taken when deciding which areas of the farm are to be utilized as winter pastures or feeding areas. Soil erosion, damage to plants, soil compaction, excessive buildup of nutrients in the soil, and poor animal performance or health are all potential problems if outdoor winter feeding is poorly planned.
2. Basic needs of the livestock
Basic needs such as access to water, adequate feed, shelter from high winds, and relatively dry soil conditions are all critical when selecting the area where the livestock will be placed. If any of these basic needs cannot be met, the outdoor wintering system will not succeed, regardless of how well it protects the environment.
3. Topography
Topography is important for three major reasons: drainage, risk of erosion, and protection from high winds. In general, higher ground drains best. However, high ridge tops are prone to experience high winds and should generally be avoided unless a tree line or windbreak is available. Look for natural land features (such as knolls) that can be excellent locations for practices such as heavy-use pads. These slightly elevated areas provide positive drainage and are naturally protected from surface water flow from adjoining areas. Low-lying areas should also be avoided.
Gentle to moderately sloping sites are ideal in most cases. Extremely flat sites often experience problems with ponding of surface water and excessive soil compaction. Extremely steep sites are more likely to experience rapid run off and can be subject to erosion.
4. Soil Characteristics
Soils vary greatly in their ability to drain water, support weight, and hold nutrients. Before selecting your livestock wintering area, it is essential that you know the characteristics of the soils on your farm. Depending upon where you live in, the soil survey data may be available either through published soil survey books or through an electronic format. Once you have obtained a soil survey, here is a step-by-step procedure for identifying the soil on your property and determining its strengths and limitations.
Start by locating your farm on the aerial photos in the soil survey. A soil survey report has on its inside front cover a section entitled “How To Use This Soil Survey.” This helps you find your property or other tract of interest on the photo-based soil maps and directs you to other places in the report to gain understanding of the occurrence and nature of soils found there. One page that you will refer to repeatedly is the Index to Map Sheets, a fold-out page that usually follows the General Soil Map but precedes the photo-based maps.
On the photo-based maps, you will notice that there are many sorts of map symbols employed to identify landscape features, including streams, roads, boundaries of soil delineations, soil map unit symbols (one in each delineation), section corners and numbers, and a variety of spot symbols representing small but significant features such as sinkholes, sandy spots, wet spots, rock outcrops, and so forth. In addition, around the borders of the individual maps there are map scales, township and range numbers, and other information. These symbols and other information are described and defined on the fold-out Index to Map Sheets page and/or on its reverse, which contains the Soil Legend and the Conventional and Special Symbols Legend.
5. Aspect
Ideally, outdoor winter-feeding areas should have southern or southeastern exposure to the sun. Sunlight helps to reduce soil moisture, increase soil temperature, and improve animal comfort. Avoid areas with obstructions to the south, such as trees, hills, or buildings that could block sunlight. Shaded area will tend to be colder and slow to dry after rain or snowfall events.
6. Environmental sensitivity of the area
On a given farm, there can be a wide array of environmentally sensitive areas. These may include areas such as stream corridors, springs or seeps, subsurface drainage tiles, ditches, wellheads, etc. Care should be taken to insure that animal waste is not allowed to accumulate in and around these sensitive areas. The following are recommendations for minimum setbacks for an animal feeding operation as set forth by the USDA Natural Resources Conservation Service Field Office Technical Guide (FOTG):
Wells and Springs – 100 feet
Waters of the State (streams and water courses) – 100 feet
Public wells – 1,000 feet
Manure nutrients can accumulate rapidly in winter feeding areas. This is especially true if the same area is used each year. Areas in and around the winter feeding area should be soil-tested annually to monitor the soil fertility level.
7. Livestock use area protection
These are protected areas that are paved with asphalt or concrete or constructed with, and surfaced with, aggregate. These areas are designed to protect the pasture, soil, and water quality from being abused. Pastures can be plugged, or trampled, by the grazing animals during the spring or other extended wet periods. This trampling can lead to plant death or thinning of the stand. The resulting mud can reduce animal performance. Mud 4 to 8 inches deep will reduce gain by 14% and mud 8 to 24 inches deep will reduce gain by 25%. The damaged pastures are susceptible to soil erosion. Run off from damaged pastures can degrade surface waters with sediment and manure. Excessive soil compaction will reduce rain infiltration and plant growth.
8. Aesthetics
When all other factors are equal, choose winter feeding locations that are well away from adjoining property lines and public roads. When this is not possible, try to take advantage of visual barriers such as trees or existing building that may help to shield the feeding area from public view. Remember, your goal is to achieve environmental stewardship as well as your production goals. Shielding the area from the public can help prevent unwarranted complaints, but it does not mean that the area can be mismanaged.
What is the biggest environmental challenge with your current system? Is it erosion and compaction done by your livestock or erosion and compaction created by your tractor or other bale-handling equipment? For many producers, the answer is the heavy equipment travel.
This table and other environmental assessment tools are located here.
Outdoor wintering can be a be tremendous cost-saving tool, but the environmental risks must carefully evaluated. Time taken to properly locate the outdoor winter-feeding area is time well spent. If you need further assistance in identifying or evaluating potential wintering areas, please contact your local SWCD or your local OSU Extension office for additional guidance.
Source: Steve Boyles, OSU Beef Extension Specialist | Oct 28, 2021

